Choose a Windows screen recorder
Windows Snipping Tool works for occasional captures. Dedicated software is more efficient for product demos, tutorials and training because source selection, system audio, microphone, zooms and editing stay in one project.
Capture the full screen, one window or an area
Use Full screen for workflows across several apps. Window capture isolates one program and keeps the desktop private. A custom area focuses the video on a precise part of the interface.
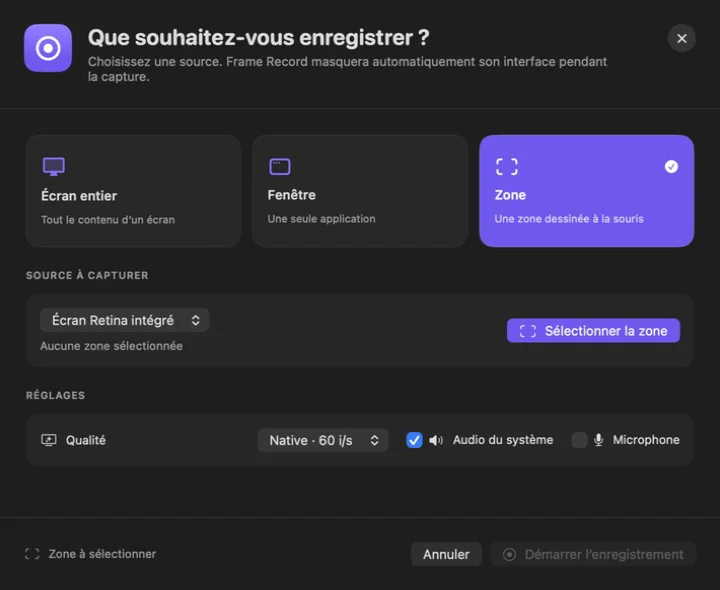
- Choose 1080p for most tutorials.
- Use 60 fps when scrolling and motion need to remain especially smooth.
- Check that small interface text remains readable in the final frame.
Record PC audio and microphone
Enable system audio to preserve app sound and microphone input to add narration. Headphones prevent speaker output from bleeding into the microphone. Check levels before the full recording and disable sources you do not need.
Edit the recording and direct attention
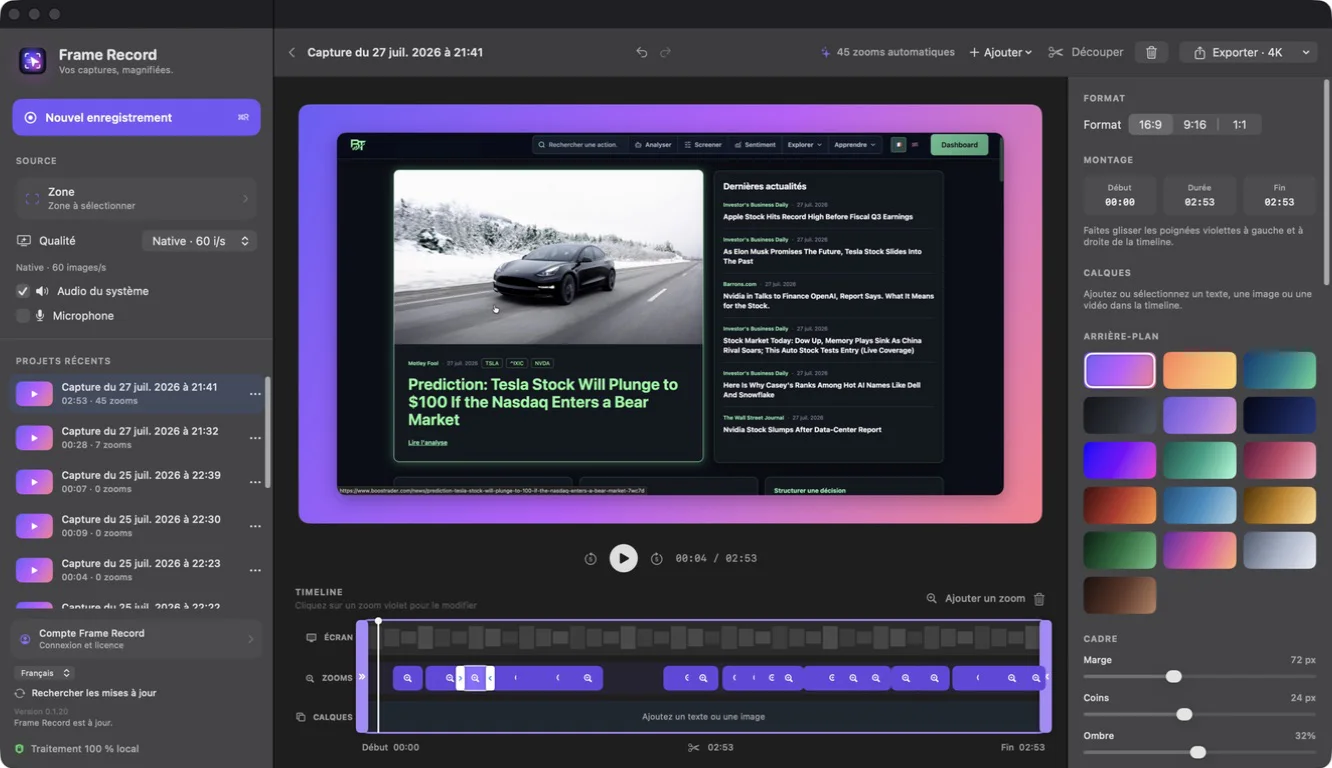
Remove delays and mistakes, trim both ends and keep only the zooms that explain an action. Add text, images and videos, position them in the preview and adjust their timing on the timeline.
Export the Windows recording as MP4
H.264 MP4 works well for the web, learning platforms and social media. 1080p is enough for most projects; choose 4K when the interface contains very small details. Review the export to check picture, sound and synchronization.